
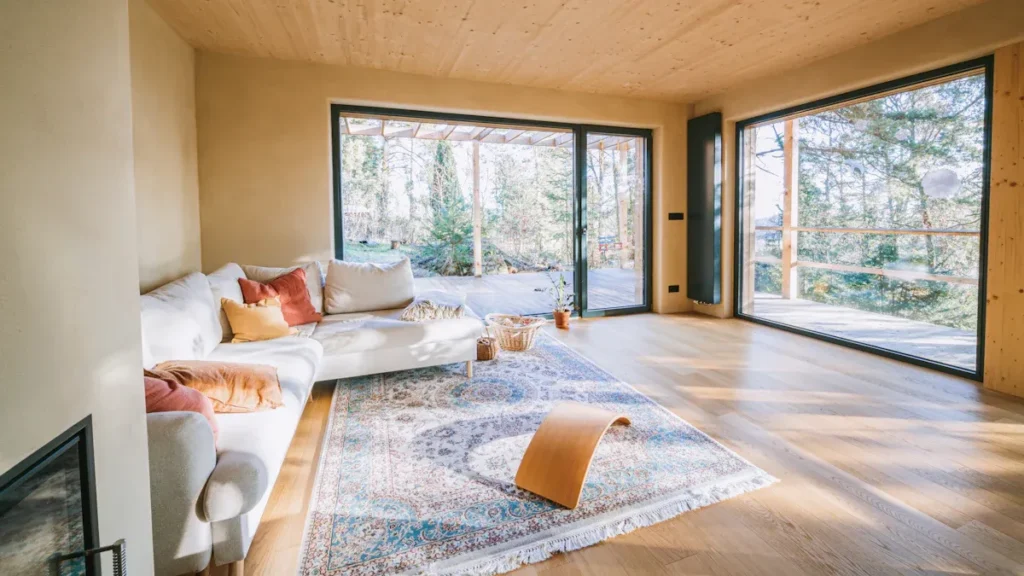
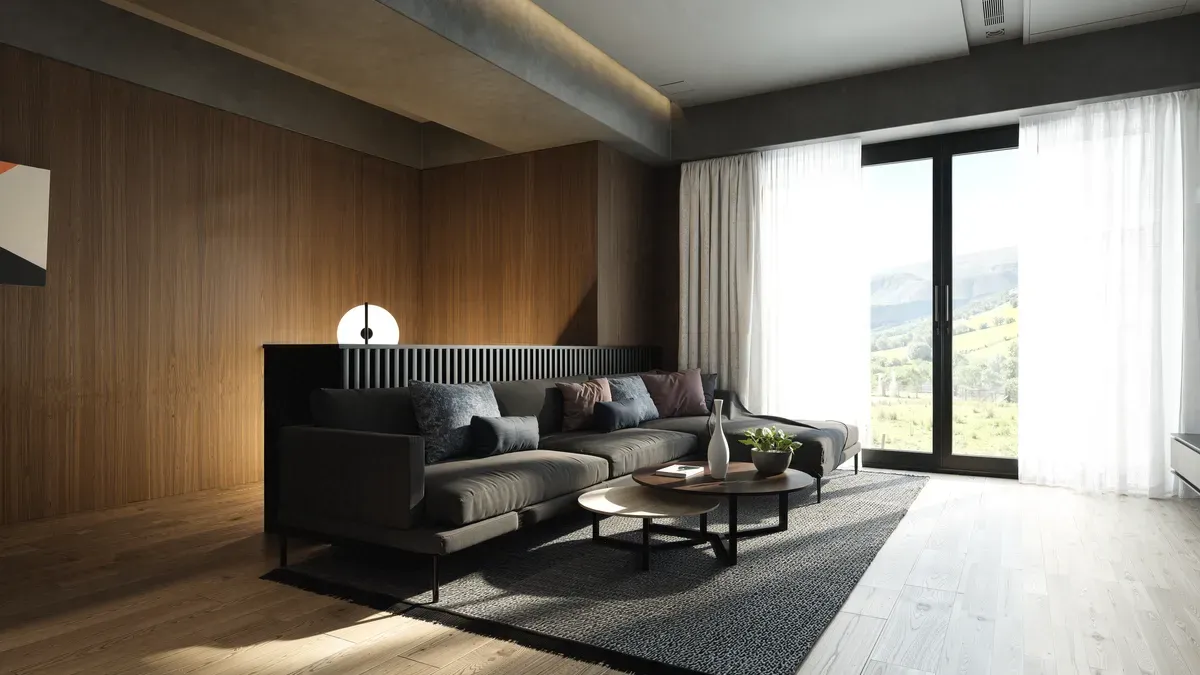
Floor to ceiling windows are a popular choice for modern homes. These large windows stretch from floor to ceiling, maximizing natural light and offering unobstructed views. Costs range from $150 to $300+ per square foot, sometimes more. Professional installation is essential for safety and performance. Floor-to-ceiling glass systems span continuously from the structural subfloor to the ceiling slab, functioning as architectural elements that require rigorous structural load engineering and wind-load calculations. This technical guide outlines frame options, structural modification requirements, and detailed cost breakdowns for residential installations.
Key Takeaways
- Floor to ceiling windows cost $700 to $1,600 per linear foot. Professional installation is essential for safety and performance.
- Choose fixed picture windows to maximize views and energy efficiency.
- Select frames and glass carefully. Aluminum, vinyl, and wood frames each have pros and cons. Double-pane glass with low-E coatings improves energy efficiency.
- Plan for permits and structural support. Building codes require tempered glass for safety. Consult a professional to handle the installation process.
Types of Floor-to-Ceiling Windows
Homeowners have several choices when selecting floor to ceiling windows. Each type serves a different purpose. The right option depends on ventilation needs, budget, and the architectural style of the home. Understanding the main categories helps buyers make an informed decision.
Fixed and Picture Windows
Fixed windows, often called picture windows, do not open. They consist of a single pane of glass set within a frame. These floor-to-ceiling windows prioritize unobstructed views and maximum natural light. The absence of moving parts makes them highly energy efficient. They also require minimal maintenance over time.
Picture windows excel in rooms where ventilation is not a priority. Living rooms, dining areas, and stairwells benefit greatly from this design. The large glass surface creates a seamless connection to the outdoors. Many homeowners pair fixed windows with operable units elsewhere in the home. This strategy balances fresh air flow with expansive scenery. Fixed floor to ceiling windows cost less than operable alternatives. The simpler mechanism reduces both material and labor expenses. However, cleaning the exterior of these large windows can be challenging. Professional cleaning services or specialized tools may be necessary.
Frame and Glass Options
The frame and glass determine how your floor to ceiling windows perform. These components affect energy efficiency, maintenance, and durability. Homeowners should evaluate each option carefully before making a final decision.
Frame Material Choices
Aluminum frames offer strength and a slim profile. This material supports large panes of glass without bulky framing. Aluminum resists corrosion and requires little upkeep. However, aluminum conducts heat readily. Modern thermal breaks help reduce this heat transfer. These breaks improve the frame’s insulating performance.
Vinyl frames provide excellent insulation at a lower cost. This material does not conduct heat as easily as aluminum. Vinyl also resists moisture and never needs painting. The main drawback involves color options. Vinyl frames come in limited shades. Darker colors may fade over time with direct sun exposure.
Wood frames deliver timeless beauty and natural warmth. Many homeowners choose wood for traditional or rustic designs. Wood requires regular maintenance to prevent rot and warping. Clad wood frames combine a wood interior with an aluminum or vinyl exterior. This hybrid option offers beauty inside and durability outside. Each material presents distinct trade-offs. The best choice depends on your climate, budget, and design preferences.
Glass Types and Coatings
The glass itself plays a vital role in comfort and energy savings. Double-pane glass remains the standard choice for floor-to-ceiling windows. Two layers of glass trap air or gas between them. This barrier slows heat transfer significantly. Triple-pane glass adds another layer for even better insulation. These windows cost more but perform well in extreme climates.
Low-emissivity coatings, called low-E glass, reflect heat while allowing light through. This coating keeps rooms cooler in summer and warmer in winter. Different low-E formulations suit different climate zones. Your installer can recommend the right product for your region.
Tempered glass offers enhanced safety for large window installations. Building codes often require tempered glass near floors and doors. This glass breaks into small, rounded pieces instead of sharp shards. Laminated glass provides another safety option. This product holds together when shattered, reducing injury risk. Gas fills between panes, such as argon or krypton, further improve insulation. These invisible gases perform better than plain air. The combination of quality frames and advanced glass creates a high-performing window system.
Cost Expectations for Homeowners
Understanding the cost of floor-to-ceiling windows helps homeowners plan their budget realistically. These large windows represent a significant financial commitment. The final price depends on multiple factors, including size, materials, and labor. Homeowners should research thoroughly before starting any project.
Average Cost Per Linear Foot
The cost of floor-to-ceiling windows varies widely based on quality and features. Standard options typically range from $150 to $300+ per square foot. Basic installed units cost between $1,000 and $1,500 per linear foot. Premium features push prices higher, reaching $2,000 to $3,000 or more per linear foot.
Individual window prices also vary considerably. A single floor-to-ceiling window unit costs between $1,000 and $4,000. Large floor-to-ceiling windows start at $1,500 per window, depending on size and materials. Full project costs range from $10,000 to $50,000 for complete installations. High-end designs can exceed $30,000 when structural requirements and customization come into play.
Homeowners should budget $150 to $300 or more per square foot for their floor-to-ceiling windows. This figure includes materials and professional installation. The wide range reflects differences in glass quality, frame materials, and regional labor rates.
Key Cost Factors
Several elements drive the overall expense of floor-to-ceiling windows. Understanding these factors helps homeowners make informed decisions about where to spend and where to save.
| Cost Factor | Contribution to High Cost |
|---|---|
| Glass type | Double or triple glazing with low-E coatings and argon gas filling significantly increases cost compared to basic single-pane glass, but enhances energy efficiency. |
| Frame material | Wood and fiberglass frames are more expensive than aluminum or vinyl, adding to the premium due to superior aesthetics and durability. |
| Installation costs | Professional installation ranges from $150 to $500 per square foot, driven by complexity, labor fees, and regional differences. |
| Customization & features | Motorized blinds, reinforced security glass, and custom shapes add extra costs beyond standard configurations. |
“Floor-to-ceiling windows require proper structural support. Consulting an architect or contractor is essential… renovations may require carpentry adjustments, which can add time and cost. Their estimates for installation range from $15,000 to $18,000, depending on the climate and level of customization.”
The investment in quality floor-to-ceiling windows pays off through energy savings and increased property value. Homeowners should consider the return on investment when evaluating premium options. Energy-efficient glass reduces monthly utility bills. Attractive windows also boost curb appeal and resale value.
Additional cost considerations include:
- Installation timelines range from a few days to several weeks, depending on structural modifications.
- Homeowners should budget $150 to $300+ per square foot.
- Full project costs can reach between $10,000 and $50,000.
- Low-E coatings are suggested for energy efficiency, adding to the premium cost.
- Privacy solutions may be needed if close to neighbors, increasing overall expense.
For durability, fixed-pane ‘picture frame’ windows are recommended for floor-to-ceiling installations, as larger windows typically don’t open. Installation takes about 2 to 4 days, with full-home replacements costing between $30,000 and $35,000. Homeowners should also budget for dust, disruption, and potential structural reinforcements, all of which contribute to the high overall cost.
The installation process itself adds significant expense. Professional labor ensures proper fitting and sealing. Poor installation leads to air leaks, water damage, and reduced energy efficiency. These problems cost more to fix than the original installation. Homeowners should never attempt DIY installation for floor-to-ceiling windows. The size and weight of these units require specialized equipment and expertise.
Regional differences also affect pricing. Urban areas typically have higher labor rates than rural locations. Climate considerations influence glass and frame choices. Homes in extreme climates need higher-performing products, which cost more. Homeowners should obtain multiple quotes from local installers to compare pricing and services.
Financing options exist for homeowners who need to spread out the cost. Many window companies offer payment plans. Energy-efficient upgrades may qualify for tax credits or rebates. Homeowners should research available incentives in their area. These programs reduce the net cost of the project.
The long-term value of floor-to-ceiling windows extends beyond monetary returns. Natural light improves mood and productivity. Unobstructed views create a connection to the outdoors. These benefits enhance daily quality of life in ways that are difficult to quantify. Homeowners who invest in quality windows enjoy these advantages for decades.
Planning Your Installation
Proper planning transforms a challenging window project into a smooth process. Homeowners who skip this phase face delays, budget overruns, and safety risks. Careful preparation addresses structural needs, legal requirements, and daily comfort.
Building Codes and Permits
Building codes exist to protect occupants. Floor-to-ceiling windows trigger specific safety rules that standard windows do not. Tempered glass becomes mandatory when a window exceeds 9 square feet and sits less than 18 inches above the floor. Windows located within 24 inches of a door also require tempered glass. This safety glass breaks into small, rounded pieces rather than dangerous shards.
Bedroom installations carry additional egress requirements. A clear opening must measure at least 20 inches wide and 24 inches high. The total opening area must reach 5.7 square feet. The sill height cannot exceed 44 inches above the floor. These standards ensure occupants can escape through the window during an emergency.
A permit becomes mandatory when the project involves structural work. A like-for-like window replacement may not require one. Homeowners should contact their local building department early in the process. An inspector must review and sign off on structural work before insulation and drywall proceed.
Structural and Climate Planning
True floor-to-ceiling windows on a structural perimeter demand serious engineering. A steel beam may need insertion to carry the structural load down to the ground. Cement footings reinforce the base. These additions raise the installation cost considerably.
The demolition process follows a careful sequence. Workers build a temporary support frame about 2 feet away from the existing wall. This frame bears the house weight during construction. The structural frame gets rebuilt in sections. Each section requires inspection and approval before workers proceed.
Electrical work completes the structural phase. Outlets and switches must relocate because the previous wall space has become glass. Homeowners should plan this expense into their budget.
Climate considerations affect glass selection and comfort. Large glass surfaces admit substantial solar heat. Low-E coatings help manage this gain by reflecting heat while allowing light through. Privacy concerns matter for homes near neighbors. Window treatments, frosted glass, or strategic landscaping offer solutions. Consulting a contractor early helps homeowners understand these structural requirements and installation tips before committing to the project.
Floor-to-ceiling windows transform a home when properly planned. The effort invested in permits, structural review, and climate planning ensures a safe, comfortable result that lasts for decades.
The Installation Process
The installation process for floor to ceiling windows demands precision, patience, and professional expertise. Homeowners who understand each phase can communicate effectively with their contractors. They can also recognize quality workmanship when they see it. This knowledge helps ensure a successful outcome for any floor-to-ceiling windows project.
Professional Assessment and Site Preparation
Every quality installation begins with a thorough professional assessment. An experienced installer visits the home to evaluate the existing wall structure. They examine the foundation, framing, and surrounding materials. This inspection reveals any hidden issues that could affect the installation process. Water damage, rot, or pest infestations require attention before work begins.
The assessment also includes precise measurements of the rough opening. Installers verify the opening dimensions match the window unit specifications. They check the wall thickness and confirm the weight-bearing capacity. Floor-to-ceiling windows carry significant weight. The structure must support both the frame and the glass safely.
Site preparation follows the assessment phase. Workers clear the area around the installation zone. They protect floors and furniture with drop cloths. Plastic sheeting seals off adjacent rooms from dust and debris. The work area needs clear access for equipment and materials. Large glass panels require careful handling and unobstructed pathways.
Demolition of the existing wall or window happens next. Workers remove old materials methodically. They dispose of debris according to local regulations. The exposed opening gets cleaned and inspected once more. Any necessary structural reinforcements occur at this stage. Steel beams or headers may need installation to support the new window’s weight.
Installation Steps and Final Inspection
The actual installation process follows a careful sequence. Workers position the new window unit into the prepared opening. They use specialized equipment to lift and hold the heavy frame securely. The frame must sit perfectly within the rough opening before any fastening begins.
Installers set and align massive glass frames into the opening using laser levels to ensure perfect alignment, keeping frames perfectly plumb, level, and square.
This laser-guided approach eliminates guesswork. It ensures the frame sits correctly from the very beginning. Proper alignment prevents operational problems and air leaks later.
Once the frame hangs in position, workers verify its alignment through a series of checks:
- Leveling: Place a level across the bottom of the window to ensure it is level.
- Vertical alignment: Place a level on the left and right sides of the window to ensure it is vertical (not leaning in or out).
- Squaring: Measure across the diagonals of the window; a square window will have equal diagonal measurements (ensuring it is not leaning left or right).
These measurements confirm the frame sits correctly. Workers make fine adjustments using shims. Shims fill small gaps between the frame and the rough opening. They also provide temporary support during the fastening process.
Fasteners secure the frame to the surrounding structure. Workers place screws or nails through pre-drilled holes. The spacing follows manufacturer specifications. Proper fastening prevents movement and maintains the window’s alignment.
Insulation fills the gaps around the frame. Expanding foam or fiberglass insulation blocks air infiltration. This step proves critical for energy efficiency. Poor insulation leads to drafts and higher utility bills. Workers also apply flashing tape to prevent water intrusion. The tape seals the joints between the window and the wall.
The final inspection completes the installation process. Workers check the window operation. They verify the glass sits securely within the frame. They examine all seals and weatherstripping for gaps. The interior and exterior trim gets installed to cover the rough edges. A final walkthrough with the homeowner reviews the completed work. The entire installation process typically spans several days for floor-to-ceiling windows. Homeowners should expect some disruption during this period. Quality installation ensures decades of reliable performance and enjoyment.
Benefits of Floor-to-Ceiling Windows
Aesthetic Appeal and Home Value
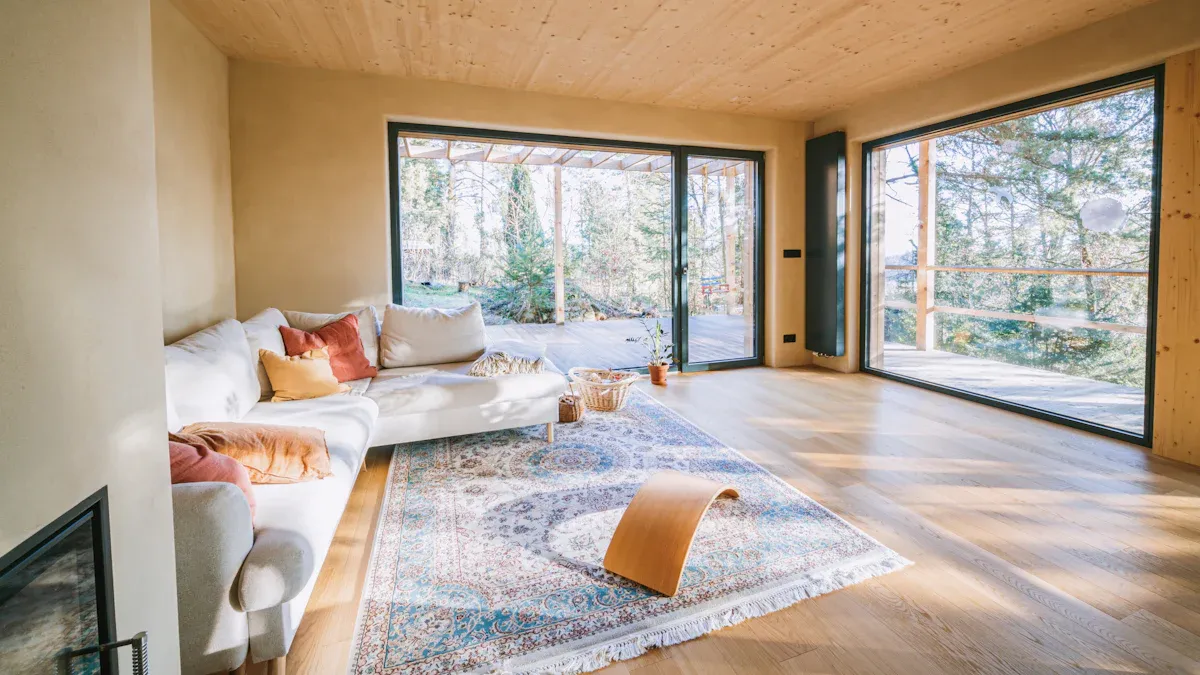
Floor to ceiling windows transform the look of any room. These large glass panels create an open, airy atmosphere that defines modern architecture. The unobstructed view makes a room feel larger and more peaceful. Indoor and outdoor spaces blend together seamlessly. This connection enhances the visual appeal of the entire home.
Partner with Professional Structural Specialists
Executing a floor-to-ceiling glass project involves high-stakes structural calculations, precise thermal management, and strict code compliance. Attempting to bypass professional engineering or structural reinforcement can lead to severe water intrusion, thermal inefficiency, and costly rework.
At George Group, we specialize in high-end architectural glazing solutions, custom framing, and seamless structural integration. Whether you are transforming a residential living space with expansive fixed picture windows or engineering heavy-duty sliding systems, our team provides end-to-end expertise from initial site assessment to final installation. Contact us today to request a custom engineering quote and professional consultation for your project.
FAQ
What is the typical cost range for floor to ceiling windows?
Standard options run $150 to $300+ per square foot. Basic installed units cost $1,000 to $1,500 per linear foot. Premium features reach $2,000 to $3,000 or more. Full projects range from $10,000 to $50,000. This investment delivers lasting value.
How long does professional installation take?
Most installations span 2 to 4 days. Structural modifications extend this timeline. Homes needing steel beams require additional days. Workers rebuild frames in sections. Each section needs inspection approval before proceeding.
Are floor-to-ceiling windows energy efficient?
Yes, with proper glass selection. Double-pane glass with low-E coatings reduces heat transfer. Argon gas fills improve insulation further. These features lower monthly utility bills. Energy-efficient upgrades may qualify for tax credits or rebates.
What safety glass requirements apply?
Tempered glass becomes mandatory when a window exceeds 9 square feet and sits less than 18 inches above the floor. Windows within 24 inches of a door also require tempered glass. This safety glass breaks into small, rounded pieces rather than sharp shards.
Do floor-to-ceiling windows require special maintenance?
Large glass panels need regular cleaning. Professional services or specialized tools help reach exterior surfaces. The benefits include minimal upkeep for fixed picture windows. These units have no moving parts. They deliver unobstructed views and abundant natural light year-round.